How to Install Natura Hybrid Turf
Step 1: Identify the Areas to Improve
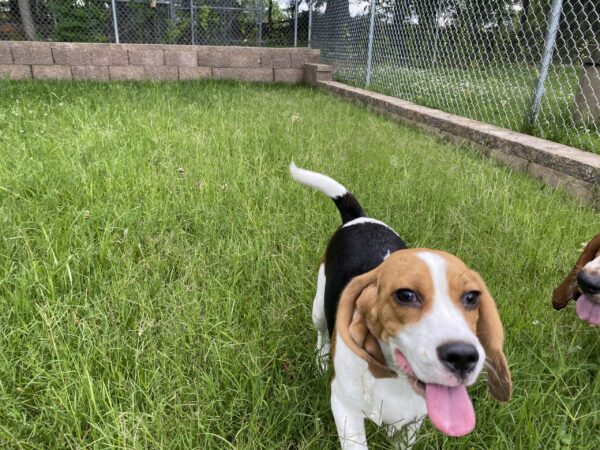
Start by identifying the parts of your yard that need the most help. This might be a muddy section near the back door, a worn path where your dog runs, or a spot where pet waste and traffic have broken down the grass over time.
Overall, look for:
- High-traffic areas
- Dog runs
- Entry points
- Areas with poor or inadequate drainage that form puddles and mud
- Spots affected by pet waste
- Areas where natural grass struggles
Natura is designed to handle these exact situations. Instead of forcing grass to survive where it can’t, it covers exposed soil and reinforces the space and the grass that grows through Natura, so it holds up better over time.
Step 2: Level the Ground
Once you’ve identified the area, the next step is to prepare the surface.
This doesn’t mean excavation or installing a base layer. You’re simply creating a relatively smooth, level surface so the dog turf lies flat. To do this:
- Remove any large debris
- Rake the area
- Fill in low spots with topsoil, if needed
Taking a few extra minutes here helps improve proper drainage and reduces the chance of puddles forming later.
Unlike traditional artificial turf installation, you’re not trying to engineer the ground. You’re just making it workable.
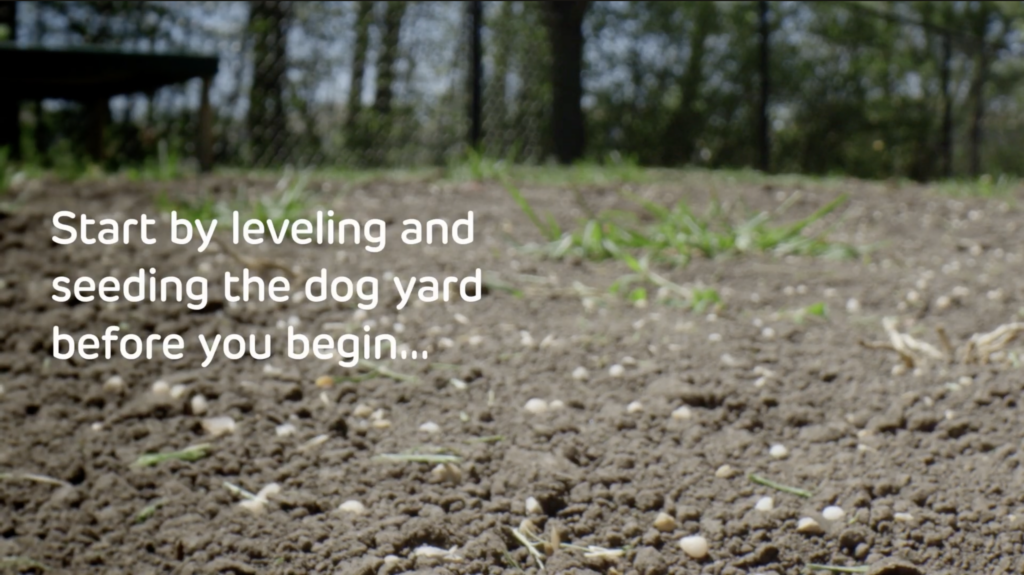
Step 3: Seed the Area (Optional but Recommended)
Natura is designed to protect the grass that grows through it, so for the best results, we recommend adding grass seed before you install.
To do this, just spread the seed as you normally would and lightly cover it with topsoil.
This then gives natural grass the best chance to establish under the surface. Natura is designed to protect grass as it grows, but it’s important to set expectations correctly: as in, Natura does not guarantee growth.
Grass may grow through in some areas, and in others it may not. Either way, the yard will function better than it did before.
Step 4: Roll Out the Turf
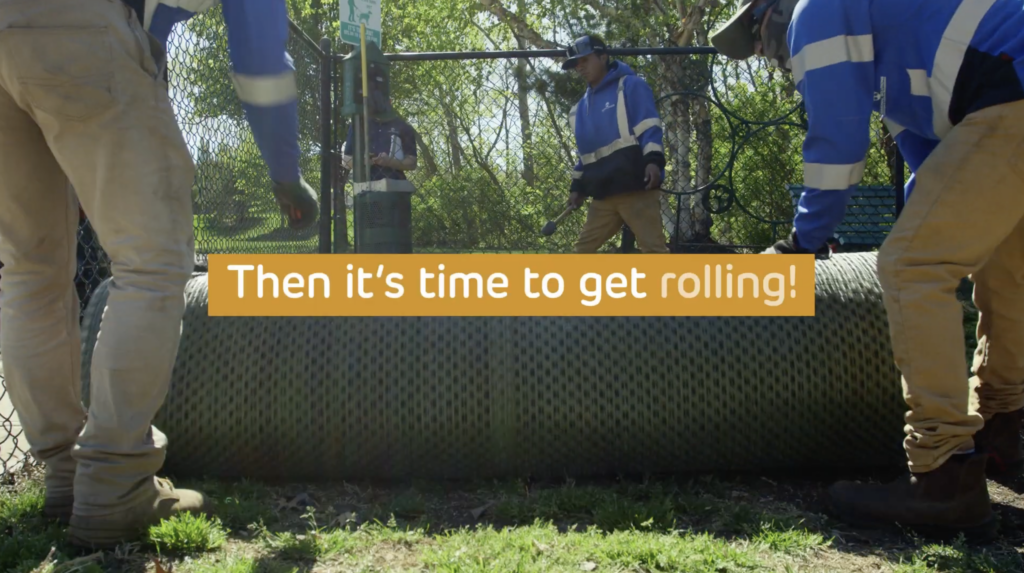
Now you’re ready to install.
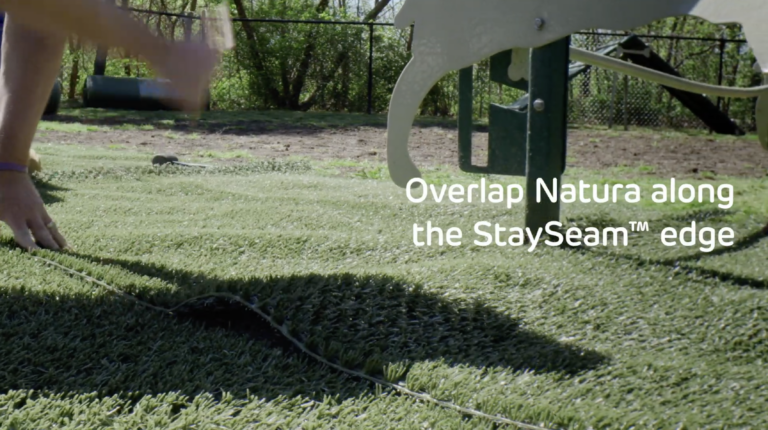
Unroll Natura over the prepared area, starting along a straight edge like a fence line or walkway. As you work across the space, align each section so the edges sit cleanly against one another and overlap using our StaySeam edge. If you need to shorten the length, adjust the shape, or cut around obstacles, you can easily cut the material with household scissors or a utility knife.
This is where Natura feels very different from synthetic turf or artificial lawn systems. There’s no concern about pile height, infill distribution, or backing layers. You’re simply placing a high-quality surface over the areas that need it.
Step 5: Secure the Turf
Once the turf is in position, use the provided biodegradable anchors to secure it to the ground.

- Start at one end, anchor it in place with a rubber mallet or hammer, then gently stretch the material with a rake so it lies flat before securing the opposite side.
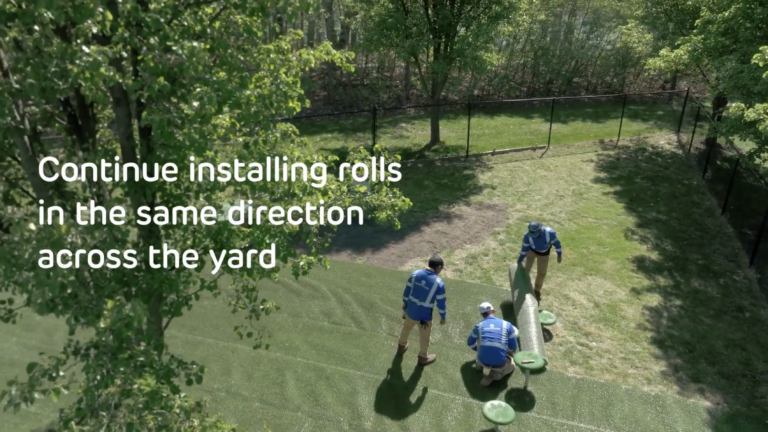
- Go back over the freshly laid roll and anchor along the edges as you go.
- Install other rolls in the same direction across the yard.
- Whenever you lay the next roll down, overlap Natura along the StaySeam™ edge, and secure anchors through both pieces to lock in place.
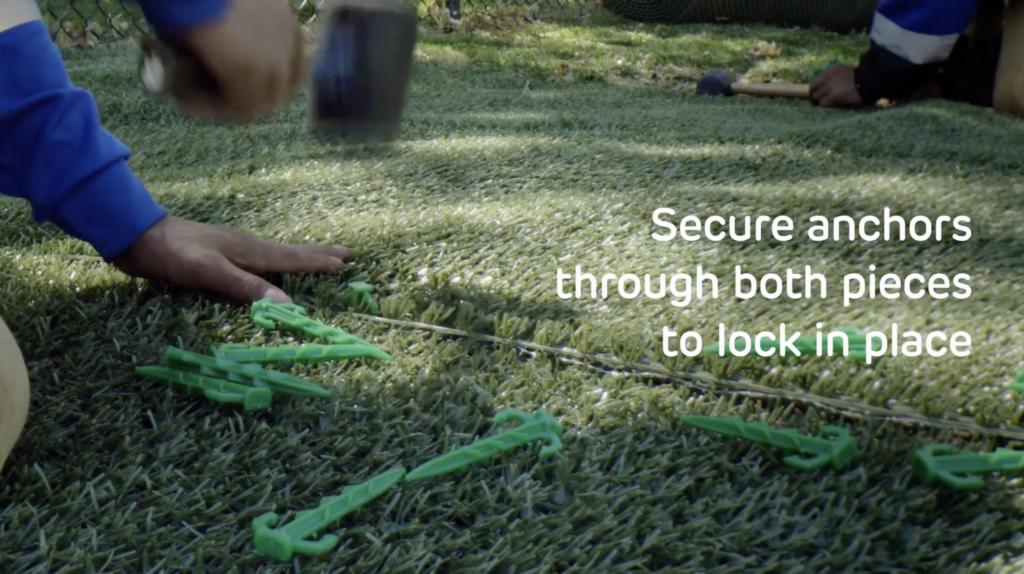
Anchors are generally placed every 12 to 18 inches for PowerRun and 6 to 9 inches for PlayZone, with additional anchors used in high-traffic areas or where the ground is uneven. This helps keep everything stable while the ground naturally settles around it.
Over time, the soil and any grass growth beneath will help hold the turf in place, reducing reliance on the anchors.
Step 6: Finish the Edges
Once everything is secured, take a final pass around the edges and seams.
If you notice any edges that aren’t sitting flat, add a small amount of topsoil or sand to help blend the edges into the surrounding ground. We also recommend filling seams and entry points to prevent lifting and keep everything looking natural.
This step gives the installation a more finished look and helps everything stay in place over time.
What Happens After Installation
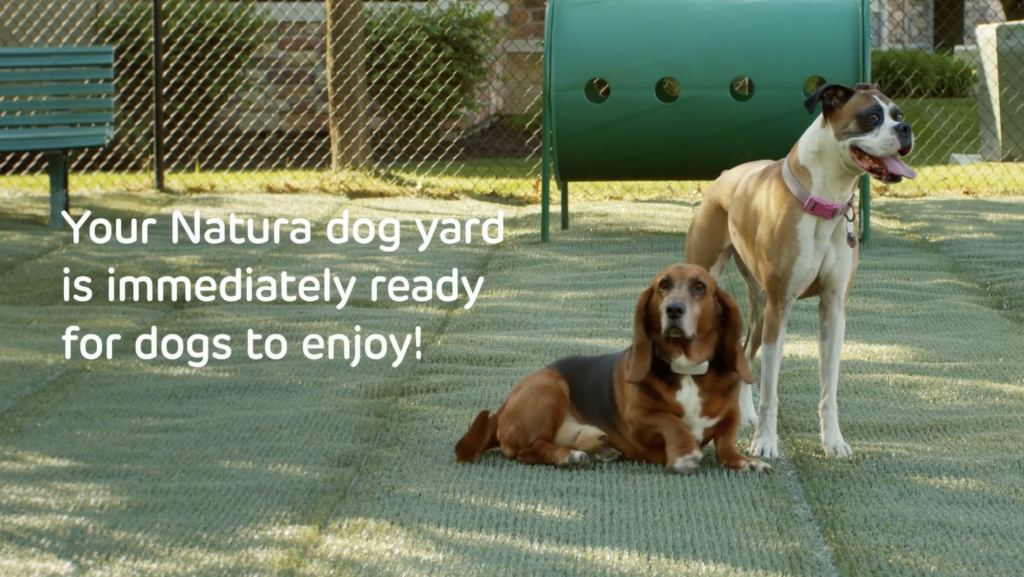
Sod has a waiting period, and full artificial grass installation requires curing time. One of the biggest advantages of Natura is that your yard is usable right away.
- No waiting period
- No curing time
- No restricted access
As soon as the turf is in place, your dogs can use the space again!
Because Natura allows water and dog urine to pass through to the soil below, it helps to avoid the odor buildup often associated with synthetic turf systems that rely on infill or antimicrobial treatments.
It also remains low-maintenance. Pick up pet waste as you normally would, rinse occasionally if needed, and continue mowing as natural grass grows through. There’s no need for turf deodorizer products or specialized cleaning routines.
What Makes Natura Different From Traditional Artificial Pet Turf Installation
Most synthetic turf or artificial lawn systems require:
- Excavation and removal of existing soil
- A compacted base layer using decomposed granite or crushed rock
- Weed barrier fabric
- Infill to support synthetic grass blades
- Professional installation in many cases
Natura skips all of that.
- No infill required
- No base material or crushed rock
- No major disruption to your natural grass
Instead, Natura installs directly over soil and begins working immediately. That’s what makes it a true DIY pet turf installation!